# Flask 시작하기 - python 다운로드 부터 IDE, localhost:8000 까지
# Python 다운로드
- 추천 Coursera 코스 : Programming for Everybody
- python 다운로드
# [IDE] Pycham 다운로드
- jetbrains 에서 제공하는 python IDE.
- Pycham 다운로드
# Pycham 에서 flask 시작하기
# 1. Project 생성
- File > New Project > Flask > "create"
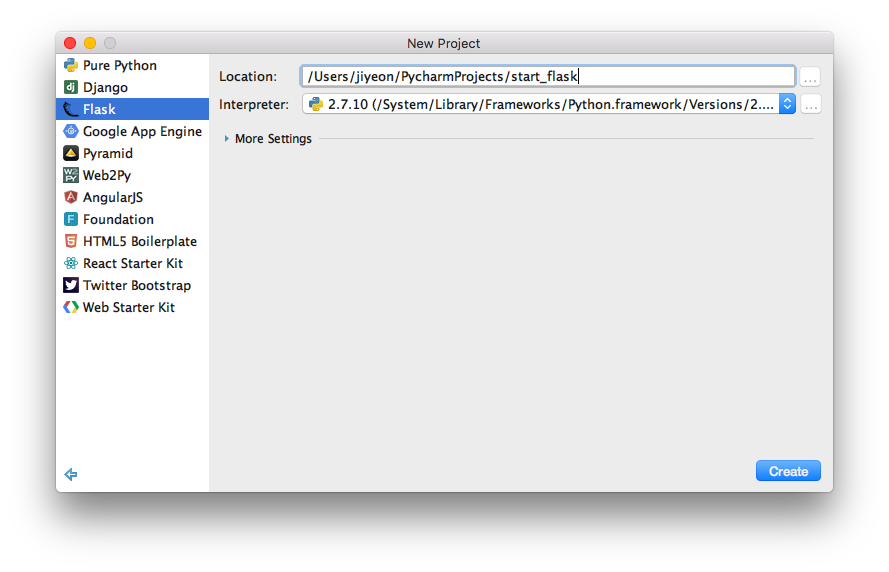
나중에 알았는데... community edition 에는 pure python 밖에 없다. 아래의 package를 맞춰 세팅해야 한다.
다음과 같은 package가 자동 생성됨.
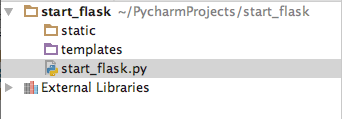
- start_flask.py
from flask import Flask

app = Flask(__name__)


@app.route('/')
def hello_world():
    return 'Hello World!'


if __name__ == '__main__':
    app.run()
# 2. 실행해보기
- ide로 실행하기
- 우측 "Run" 버튼 클릭!

- 명령어로 실행하기
> python start_flask.py
* Running on http://127.0.0.1:5000/ (Press CTRL+C to quit)
http://127.0.0.1:5000/ (opens new window) 로 들어가면 고전적인 Hellow World! 가 찍혀있는 화면을 확인 할 수 있다.
# 2-1. Debug 모드로 실행하기
from flask import Flask

app = Flask(__name__)


@app.route('/')
def hello_world():
    return 'Hello World!'


if __name__ == '__main__':
    app.run(debug=True) # Debugger is active!
- Debug 모드에서는 저장하면 다시 restart 됨.
# 3. Routing
@app.route('/tuna')
def tuna():
    return '<h2>Tuna is good</h2>'
- http://127.0.0.1:5000/tuna 로 들어가면 Tuna is good
@app.route('/profile/<username>') # plain string
  def profile(username):
    return '<h3>hey there %s</h3>' % username

@app.route('/post/<int:post_id>') # specific type
  def show_post(post_id):
    return '<h3>Post ID is %s</h3>' % post_id
- url path 가져오기
- type 값을따로 주지 않으면 string, 특정 type으로 받고 싶을 때는 {type}:{값}
# 4. Http method
from flask import Flask, request

## HTTP method : import request
@app.route('/method')
def method():
    return 'Method used : %s' % request.method

@app.route('/bacon', methods=['GET', 'POST'])
def bacon():
    if request.method == "POST":
        return 'You are using POST'
    else:
        return 'You are probably using GET'
- request를 import 받아야 한다.
# 5. HTML Templates
from flask import Flask, request, render_template
# need packages : templates , static
@app.route('/profile/<name>')
def profileWithTemplate(name):
    return render_template('profile.html', name=name)
<!-- profile.html -->
<!DOCTYPE html>
<html lang="en">
<head>
    <meta charset="UTF-8">
    <title>Welcome!</title>
    <link rel="stylesheet" type="text/css" href="{{"{{ url_for('static',filename='style.css')"}}}} " /> <!-- dynamic generate path-->
</head>
<body>
<h1>Hey! there {{ "{{name" }}}}, yo!</h1>
</body>
</html>
- render_template 를 import 받아야 한다.
- templates 패키지 아래에 html 파일을 생성.
## Mapping Multiple URLs
@app.route('/multi')
@app.route('/multi/<user>')
def multi(user=None): ## None by default
    return render_template('user.html', user=user)
<!-- user.html -->
<!DOCTYPE html>
<html lang="en">
<head>
    <meta charset="UTF-8">
    <title>Welcome!</title>
    <link rel="stylesheet" type="text/css" href="{{ url_for('static',filename='style.css') }}" /> <!-- dynamic generate path-->
</head>
<body>
    <h1>Hey! there {{name}}, yo!</h1>
</body>
</html>
- 여러 url 매핑 위와같이 @app.route()로 나열
## Passing Objects into Templates
@app.route('/shopping')
  def shopping():
    food = ["Cheese", "Tuna", "Beef"]
    return render_template('shopping.html', food=food)
<!DOCTYPE html>
<html lang="en">
<head>
    <meta charset="UTF-8">
    <title>Shopping</title>
</head>
<body>
    <ul>
        {% for item in food %}
            <li>{{ item }}</li>
        {% endfor %}
    </ul>
</body>
</html>
- 위와 같이 넘어온 파라미터를 iterate 할 수 있다.
# Github repository
- 위 예제는 jiyeonseo/start_flask (opens new window) 에서 확인할 수 있다.