# Azure Function + Telegram chatbot 만들기
Serverless Telegram bot on AWS Lambda (opens new window) 는 AWS 람다 + Python 을 이용하여 텔레그램 봇을 만드는 실습 블로그인데, 읽다가 왠지 조금 다르게 해보고 싶어서 Azure Function + Node 로 살짝 다르게 실습해 보았다.
# 준비사항
- Node v6.5.0 이상
- MS Azure 계정
- 텔레그램 계정
# 1단계 : Telegram Bot 생성 및 토큰 받기
@BotFather (opens new window) 에서 봇을 만든다.
/newbot: 새로운 봇 생성. 이름은 *_bot 과 같은 형식으로
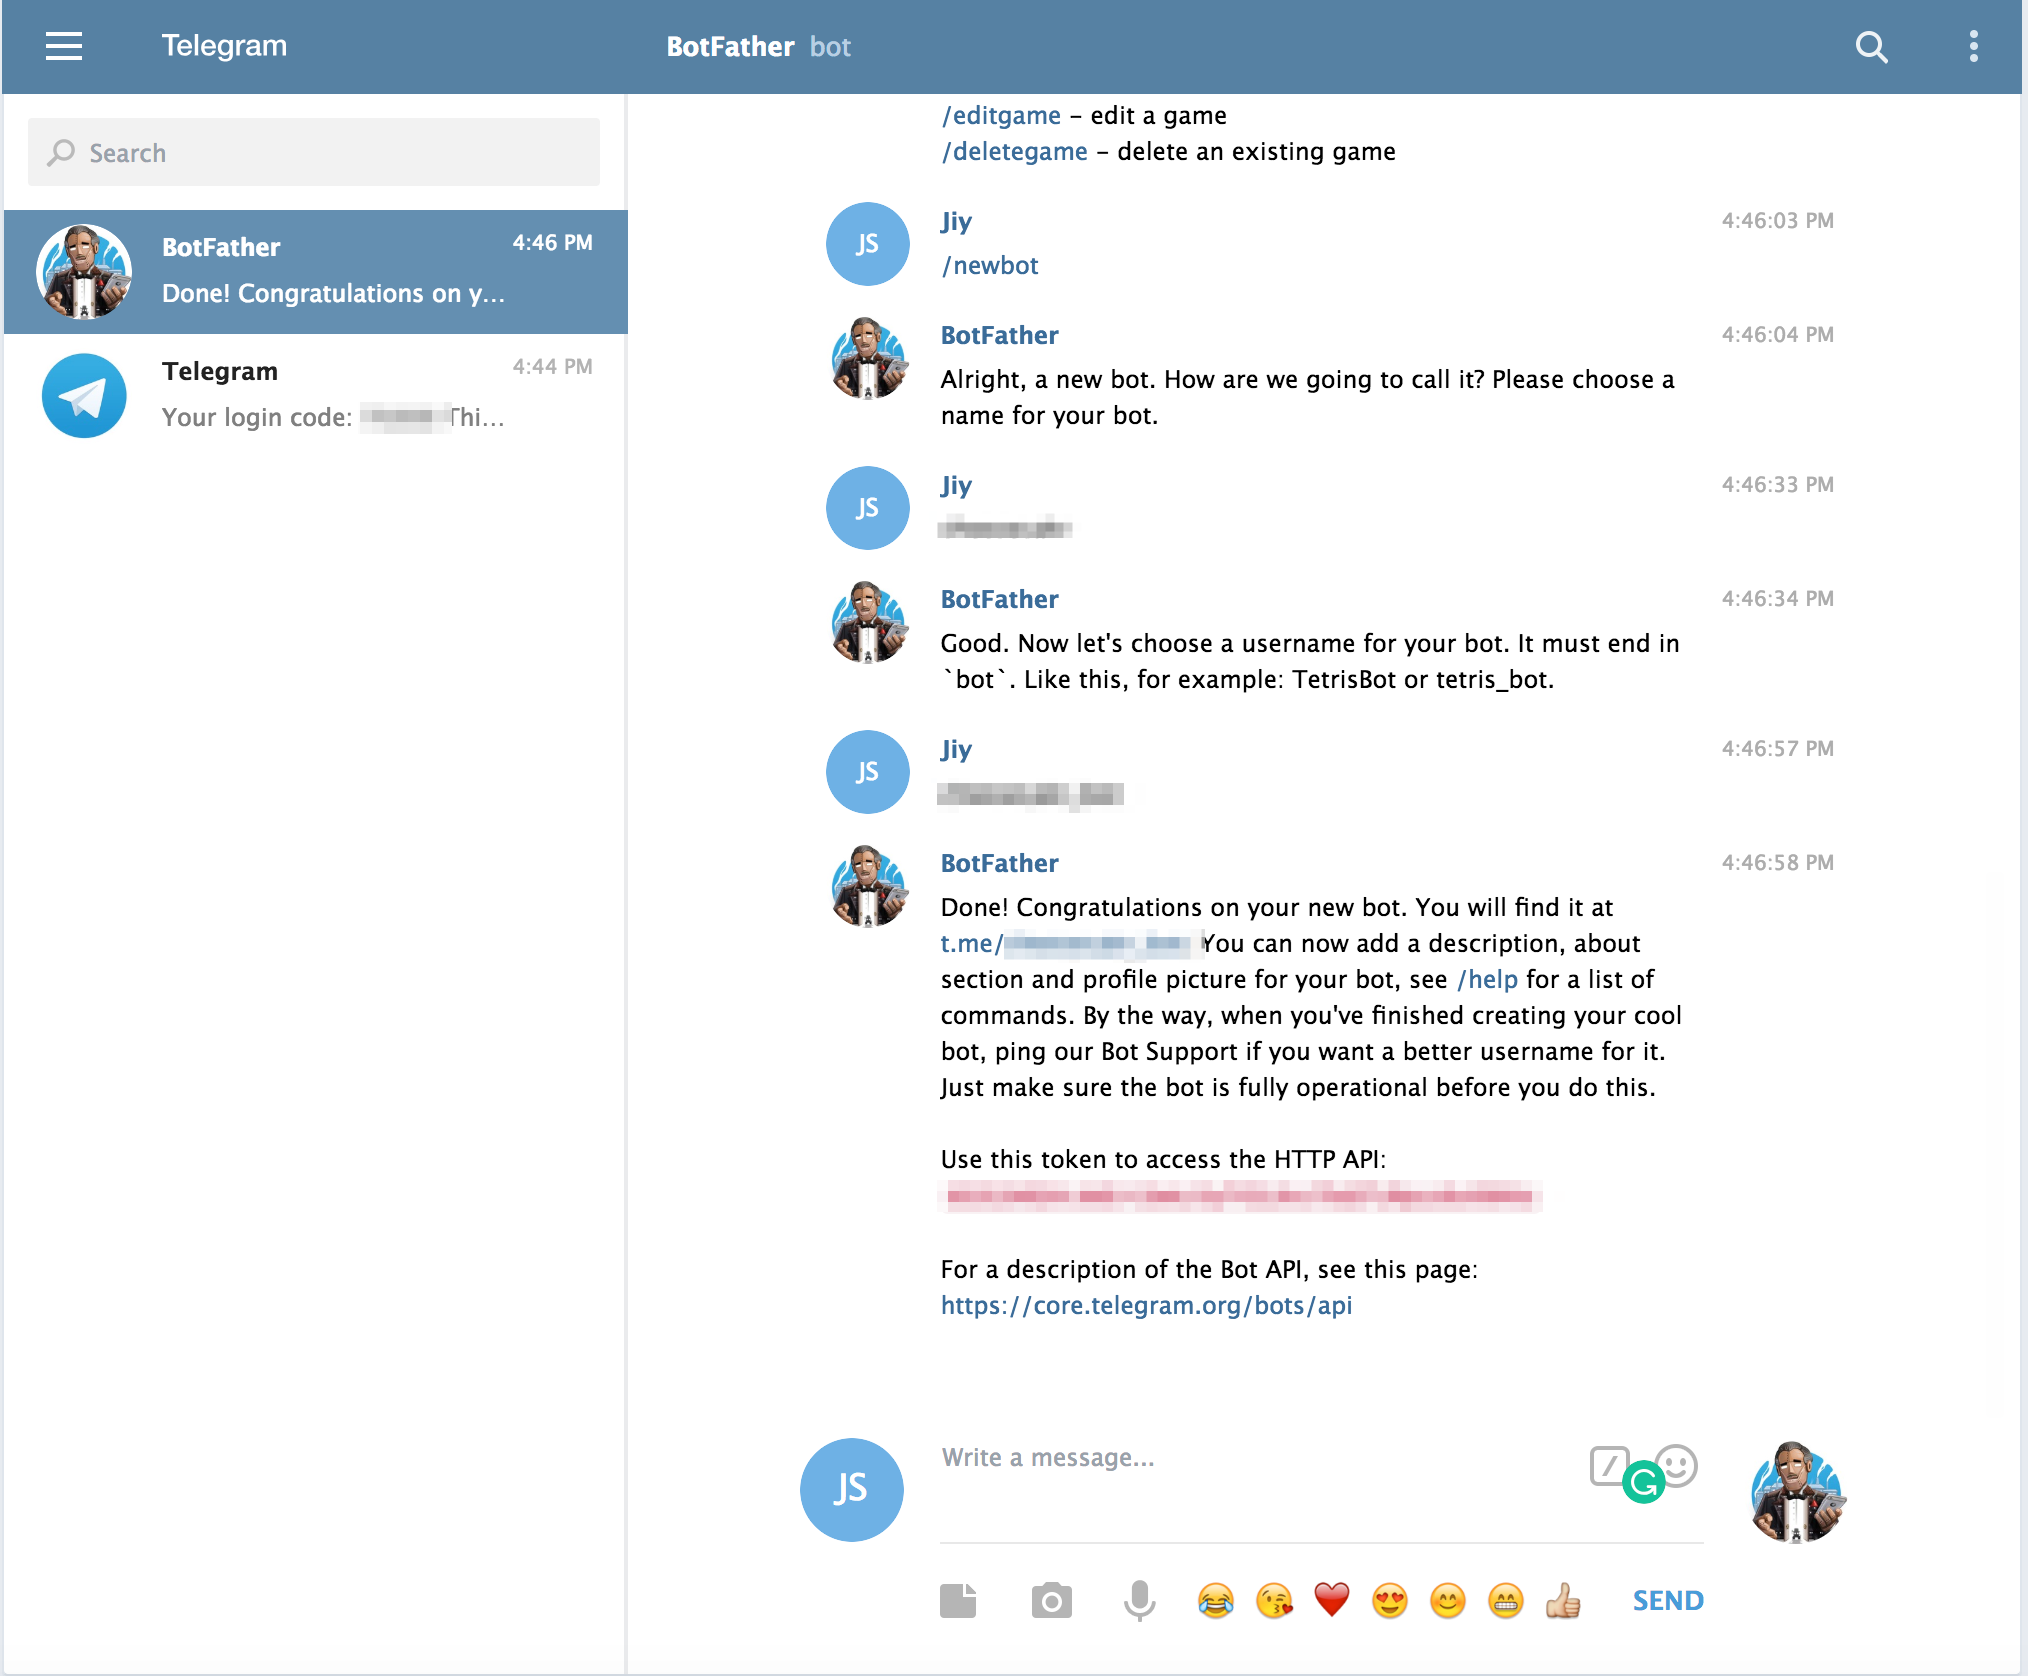
마지막에 발급 받은 Token을 나중에 사용한다. 봇 생성 끝!
# 봇과 나의 챗 아이디
만약 내 봇과의 대화에서 나에게만 보내고 싶은 정보가 있거나, 나의 채팅방에만 메세지를 전달해야할 때 챗 아이디를 알면 편리하다
내 봇과 아무말을 한 뒤, getUpdates를 이용하면 내 챗 아이디를 찾을 수 있다.
curl https://api.telegram.org/bot{bot_token}/getUpdates`
{
    ok: true,
    result: [
        {
            update_id: 79374297,
            message: {
                message_id: 54,
                from: {
                    id: #myid,
                    is_bot: false,
                    first_name: "Cheese",
                    last_name: "Seo",
                    language_code: "ko"
                },
                chat: {
                    id: 1234567890, // chat_id
                    first_name: "Cheese",
                    last_name: "Seo",
                    type: "private"
                },
                date: 1589148395,
                text: "Hey"
             }
        }
    ]
}
# 2단계 : Serverless framework 를 이용한 프로젝트 생성
쉽게 사용하고 쉽게 배포할수 있는 Severless framework (opens new window)을 사용하겠다. 이 프레임워크에서는 AWS, Azure 뿐만 아니라 Google cloud 등 다양한 클라우드 프로바이더 (opens new window)에 대해 서포트 하고 있으니 원하는 클라우드에 따라서 선택하면 된다. 이번 블로그에서는 Azure function을 사용해 보도록 하겠다.
# Serverless framework 설치
$ npm install -g serverless
# 새로운 프로젝트 생성
$ serverless create --template azure-nodejs --path {path_name} --name {my-unique-name}
새로 생성된 프로젝트 폴더로 들어가면 두 개의 파일이 생성된 것을 볼 수 있다.
handler.js: node 코드로 된 템플릿serverless.yml: 설정 파일
$ cd {path_name}
$ npm install
# 3단계 : Serverless 배포 및 확인
$ serverless deploy
만약, Azure에 미리 로그인이 되어있지 않다면 로그인 하는 페이지가 열리게 된다. 그리고 다음과 같이 로깅이 뜨는 걸 볼 수 있다.
Serverless: WARNING: Missing "tenant" and "app" properties in serverless.yml. Without these properties, you can not publish the service to the Serverless Platform.
Serverless: Building Azure Events Hooks
Serverless: Parsing Azure Functions Bindings.json...
Serverless: Building binding for function: hello event: httpTrigger
Serverless: Building binding for function: hello event: http
Serverless: Packaging service...
Serverless: Excluding development dependencies...
Serverless: Logging in to Azure
Serverless: Creating resource group: azure-telegram-sample-rg
Serverless: Creating function app: azure-telegram-sample
Serverless: Waiting for Kudu endpoint...
Serverless: Uploading function: hello
# invoking
$ serverless invoke -f hello -l
# log
serverless logs -f hello -t
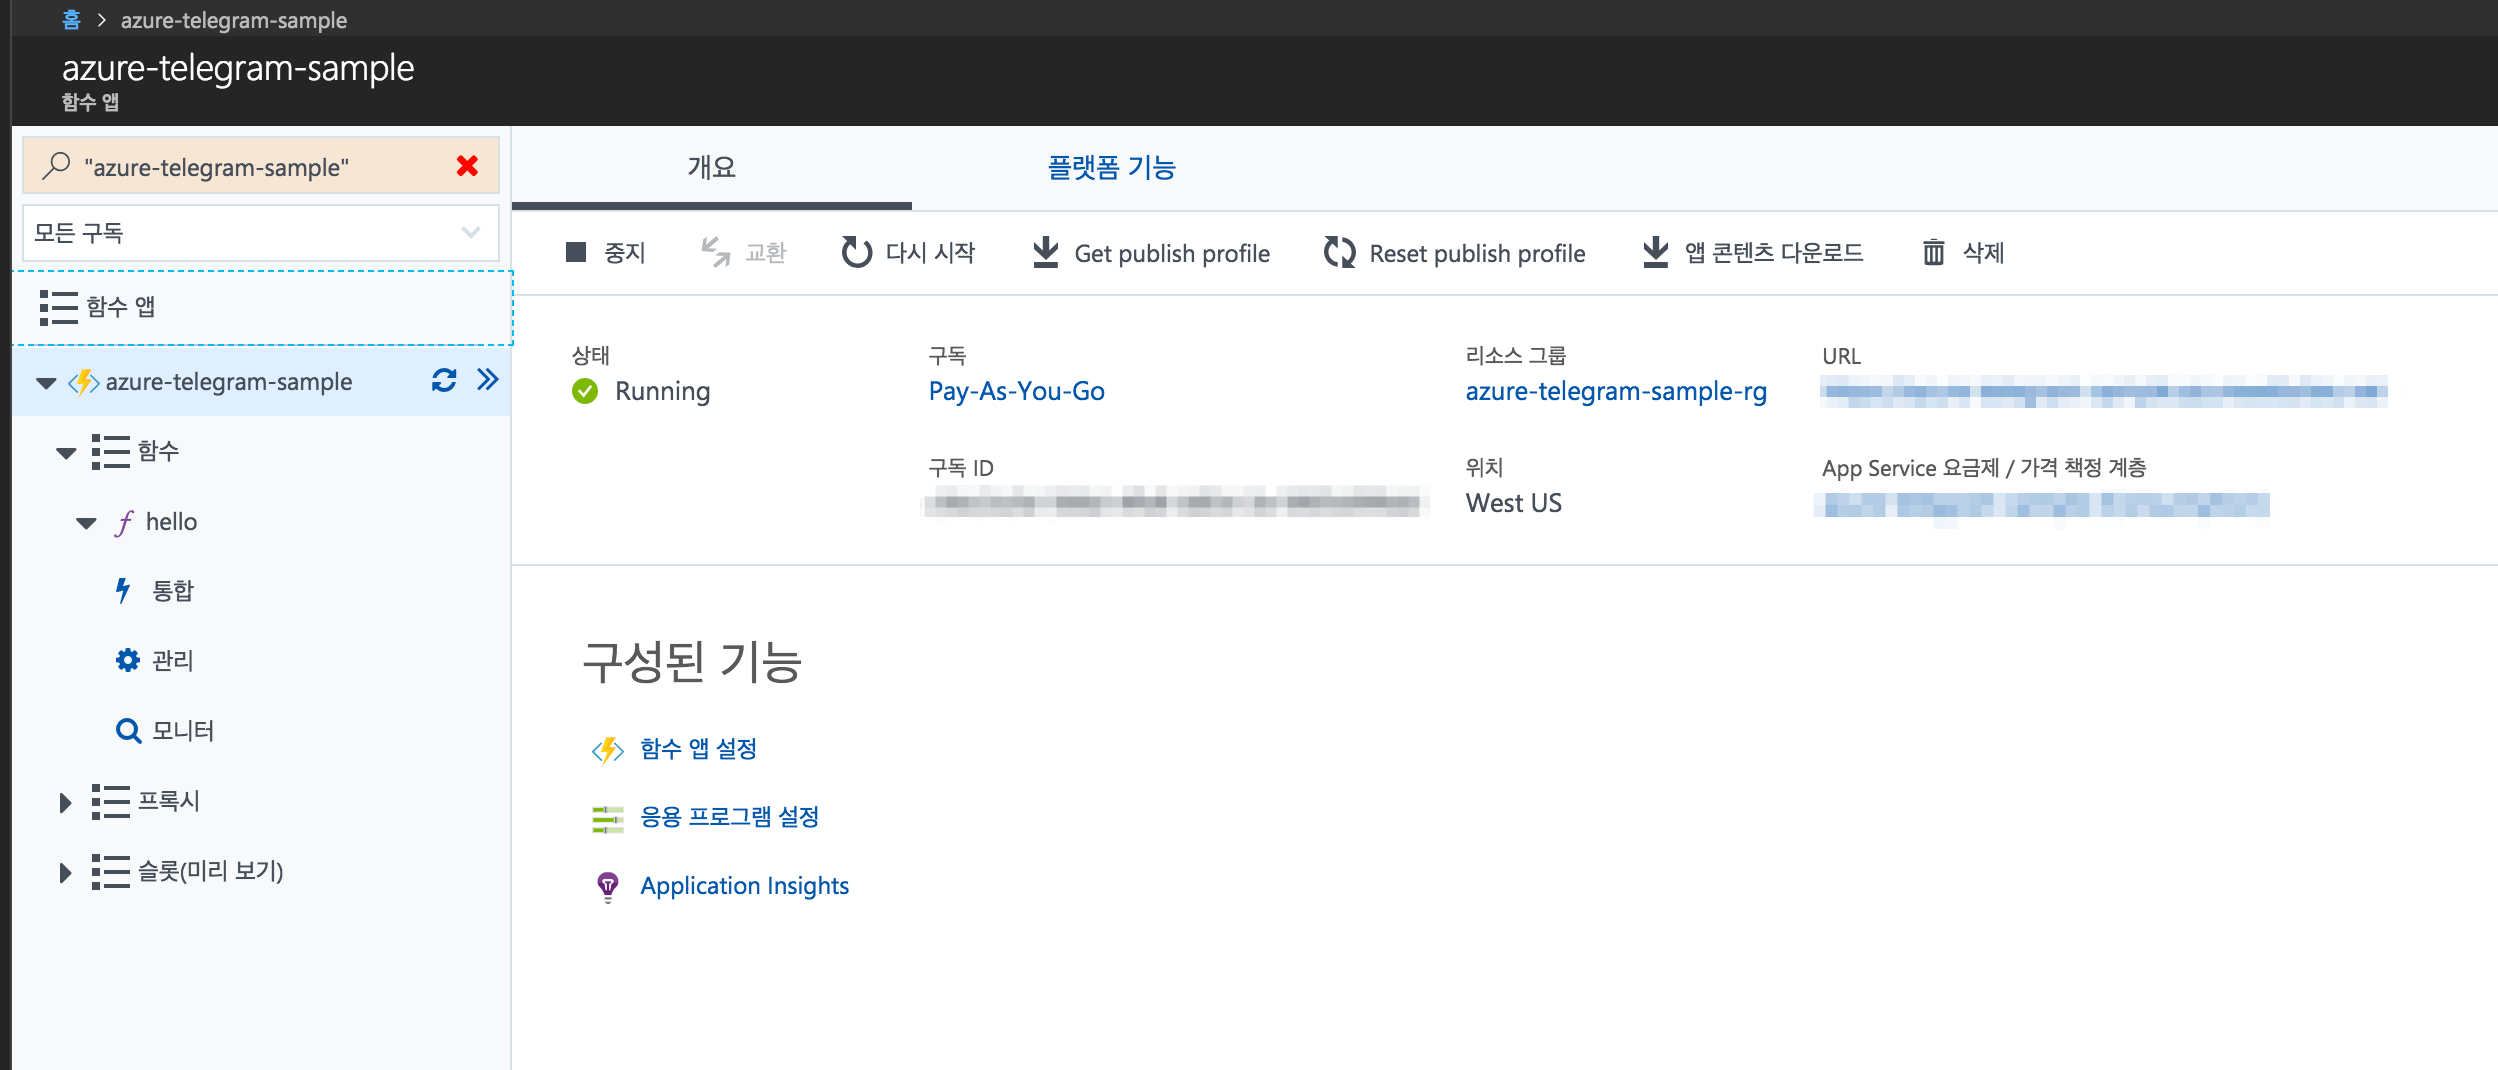
Azure Portal (opens new window) 에 들어가 Azure Function을 확인하면 새로운 함수 앱과 함수 hello가 생성된 것을 확인 할 수 있다.
# 4단계 : Telegram bot (Node.js)
텔레그램 봇 개발을 더 편하게 하기위해 아래 패키지들을 추가로 설치해준다.
$ npm install --save node-telegram-bot-api request
node-telegram-bot-api(opens new window) : Telegram Bot API for NodeJS
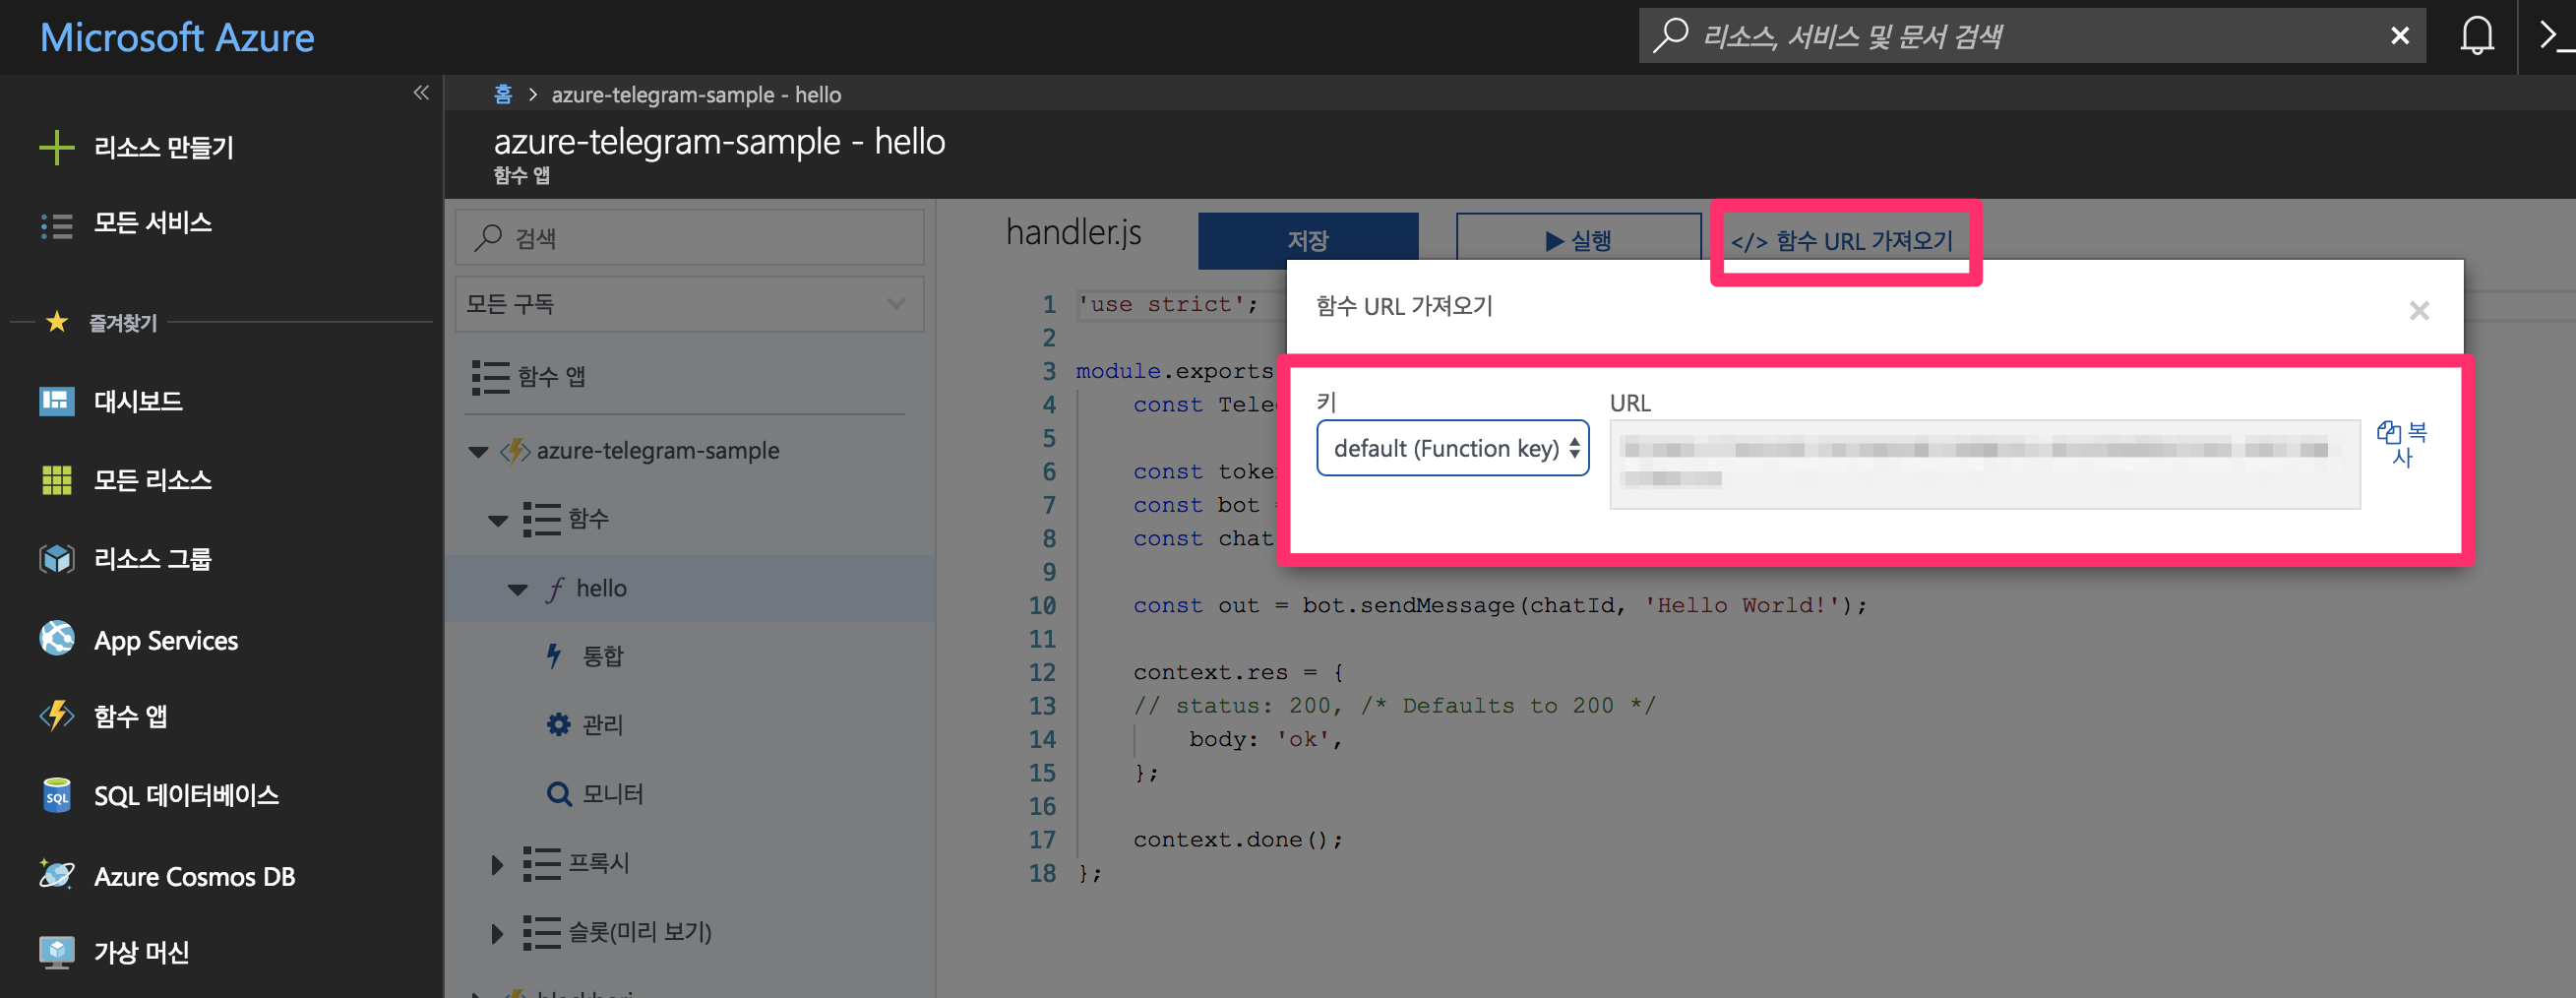
위에서 생성된 handler.js 에 다음 코드를 복사 붙혀넣기 한다
'use strict';

module.exports = (context, req) => {
    const TelegramBot = require('node-telegram-bot-api');

    const token = "YOUR_API_TOKEN";
    const bot = new TelegramBot(token);
    const chatId = req.body.message.chat.id;

    const out = bot.sendMessage(chatId, 'Hello World!');

    context.res = {
    // status: 200, /* Defaults to 200 */
        body: 'ok',
    };

    context.done();
};
그리고 배포
$ serverless deploy
# 5단계 : Telegram bot과 연결
Portal > Function App -> 만든 functionn app -> function "hello"를 들어가면 url end point를 얻을 수 있다.
https://api.telegram.org/bot<Your Telegram TOKEN>/setWebhook 로
발급받은 endpoint 를 연결해준다.
$ curl --request POST --url https://api.telegram.org/bot{token}/setWebhook --header 'content-type: application/json' --data '{"url": "{end-point}"}'
# 6단계 : demo!
봇에게 말을 걸어보면!
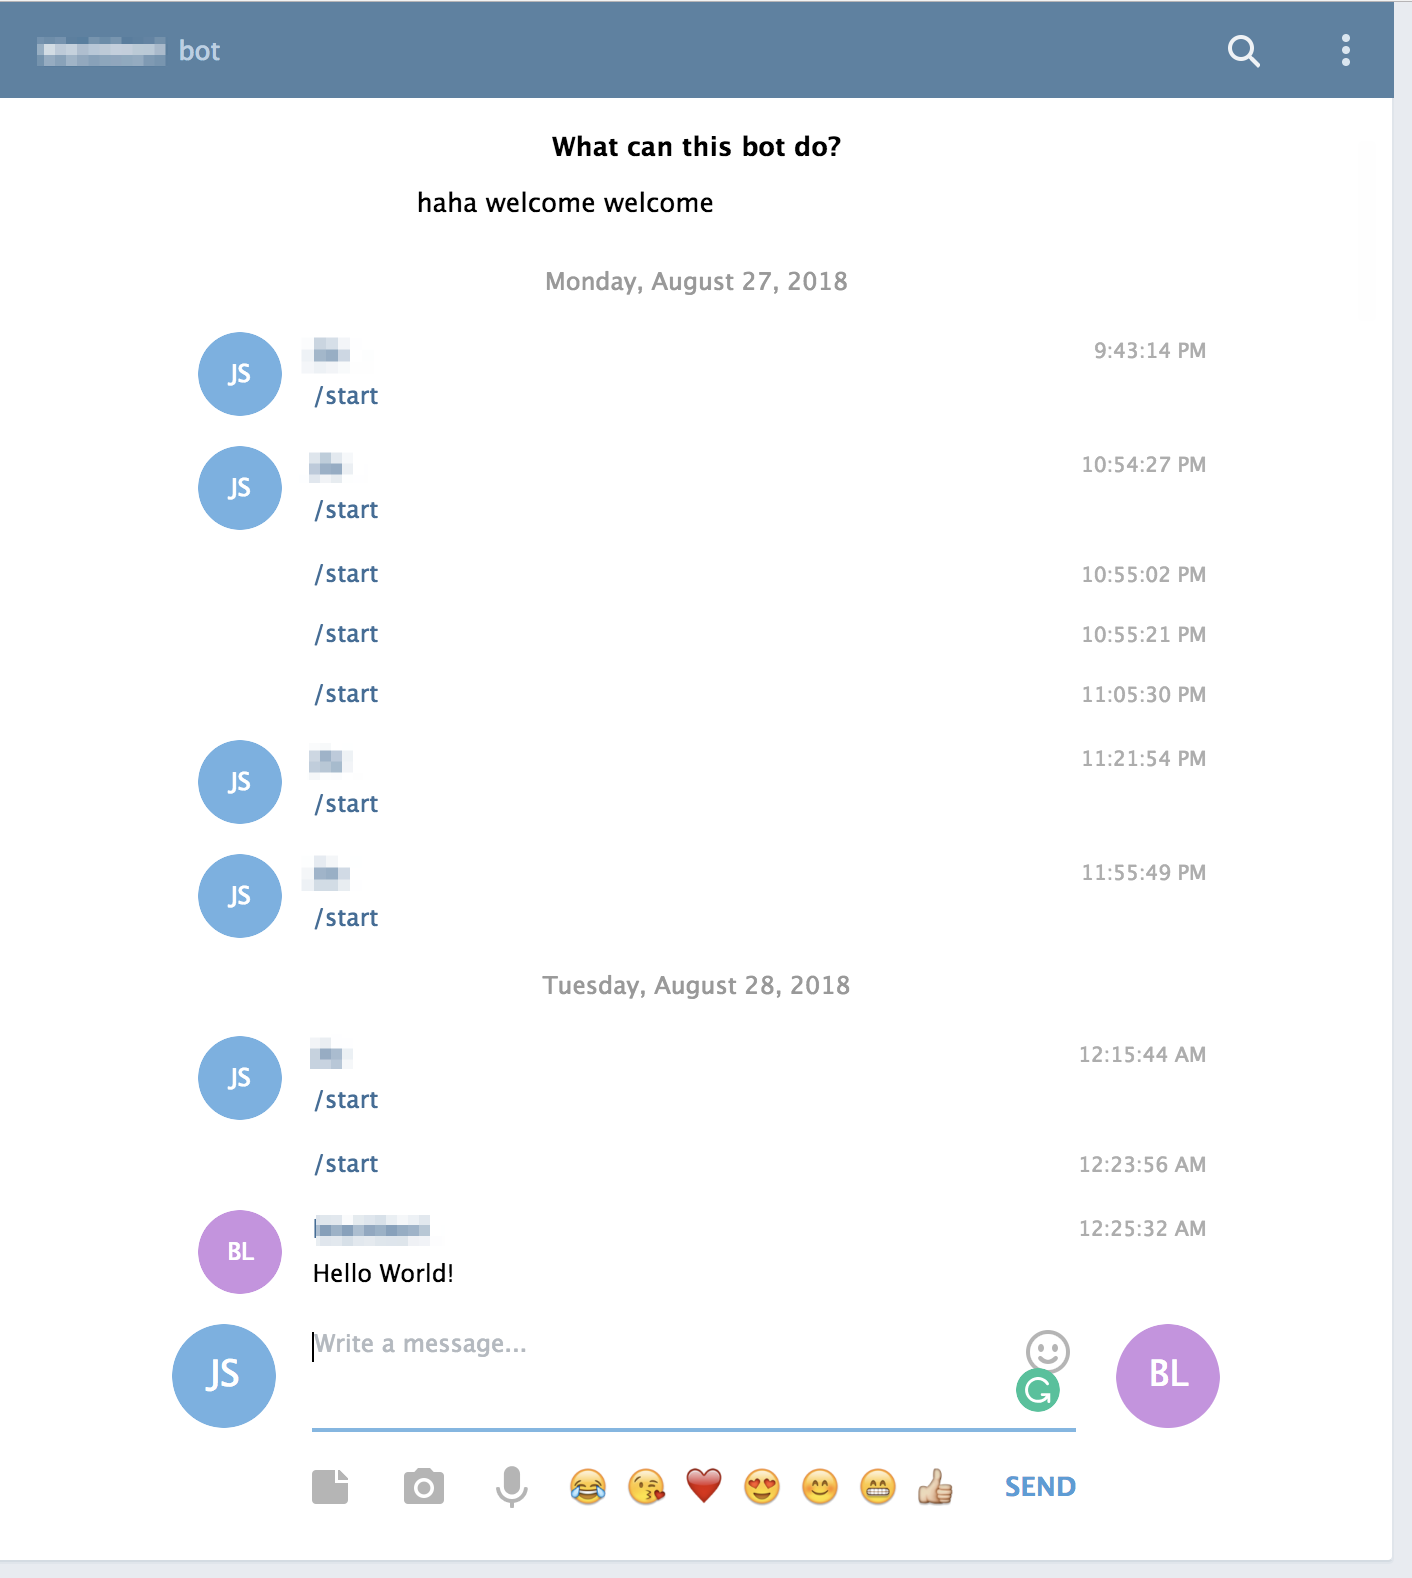
끄읕!
# 소스코드
https://github.com/jiyeonseo/azure-telegram-sample (opens new window)